回合制游戏中的寻路以及显示移动范围

This article was last updated on <span id="expire-date"></span> days ago, the information described in the article may be outdated.

这几天看了Making a Turn Based Strategy Game in Unity的视频,打算尝试做一个回合制的游戏。这应该是我的第一款全程独立制作(指的是自己思考代码结构,而非照着视频抄写游戏),因此预计会花上更长的时间去准备和沉淀,但是希望能够最终完成。我目前的想法是做成一个类似于陷阵之志的3D回合制策略游戏。虽然我原本的想法远非如此,但是考虑到自己的代码能力,还是决定不要眼高手低了。接下去我会记录下游戏开发中一些值得记录的点子,基本会按照开发的顺序来记录(可能在完成后会进行整理)。预计的开发时间(包括学习时间)在3个月左右。

A*算法

尽管此前已经写过A*算法了,但是实际创建的时候还是遇到了一些问题。我发现C#中居然没有自带的优先队列。由于不想过度优化(实际上是懒惰),我就放弃了手写一个的打算(希望日后能补上).由于原理不难,我就不贴代码了。还有一个发现就是有关带权A*算法的问题。做一个简单的总结.

1
fScore[neighbour] = tentative_gScore + w * h_Manhattan(neighbour.x, neighbour.y, targetX, targetY);

此时,当w = 0时,A*为dijkstra算法。当0 < w < 1时候,A*算法更像会不注重速度,而是在乎准确性。当w>1的时候,此时的最终路径则不一定是最优的。当w远大于h的时候,A*就会接近于BFS.

class重载==操作符遇到的怪事

当我试图给class重载==以及!=操作符遇到的一个奇怪的问题.在一开始, 我直接将代码写成如下形式:

1
2
3
4
5
6
7
8
public static bool operator ==(Node left, Node right)
{
if (left.x == right.x && left.y == right.y)
{
return true;
}
else return false;
}

但是这种写法,在我使用类似 node == null进行判断的时候就会爆空引用。这是合理的,因为此时我的right必然是null。因此,我对原有代码稍作修改,如下所示:

1
2
3
4
5
6
7
8
9
10
11
12
13
14
15
16
17
18
19
20
21
public static bool operator ==(Node left, Node right)
{

if (left == null)
{
if (right == null) return true;
else return false;
}
else
{
if (right == null) return false;
else
{
if (left.x == right.x && left.y == right.y)
{
return true;
}
else return false;
}
}
}

写完后我立刻就发现了问题,显然left == null 这句会循环调用我定义的操作符==,运行后也果然爆栈了。一番思索过后,我放弃了解决。不过我发现有人也遇到了我类似的问题一个解决方法,虽然使用equals的方法并不优美,但好像也只能这么做了。另一个解决方法是使用node is object语句判定。因为所有的类型都继承自object,这种做法显然更加合理.

使用BFS显示移动范围

接下去我来介绍一下如何显示合理的移动范围.Node类的定义以及主要逻辑代码如下所示.

1
2
3
4
5
6
7
8
9
10
11
12
13
14
15
16
17
18
19
20
public class Node 
{
public List<Node> neighbours;
public int x;
public int y;
public TileType nodeType;
public bool isVisited_movementRange;
public float remainMovement;
public float DistanceTo(Node n)
{
return Vector2.Distance(new Vector2(this.x, this.y), new Vector2(n.x, n.y));
}
public Node(int x, int y)
{
this.x = x;
this.y = y;
this.neighbours = new List<Node>();
}
}

1
2
3
4
5
6
7
8
9
10
11
12
13
14
15
16
17
18
19
20
21
22
23
24
25
26
27
28
29
30
31
32
33
34
35
36
37
38
void showMovementRange(int x1, int y1)
{
List<Node> moveRange = new List<Node>();
for (int x = 0; x < mapSizeX; x++)
{
for (int y = 0; y < mapSizeY; y++)
{
graph[x, y].isVisited_movementRange = false;
}
}
Node root = graph[x1, y1];
root.isVisited_movementRange = true;
root.remainMovement = 5;
Queue<Node> Q = new Queue<Node>();
Q.Enqueue(root);
while (Q.Count > 0)
{
Node v = Q.Dequeue();
foreach (var vn in v.neighbours)
{
if (vn.isVisited_movementRange)
continue;
if (v.remainMovement - (1 + vn.nodeType.extraCost) >= 0)
{
vn.remainMovement = v.remainMovement - (1 + vn.nodeType.extraCost);
vn.isVisited_movementRange = true;
moveRange.Add(vn);
Q.Enqueue(vn);
}
}
}

foreach (var move in moveRange)
{
Debug.Log(move.x + "," +move.y);
}
MapUI.instance.showMovementRange(moveRange);

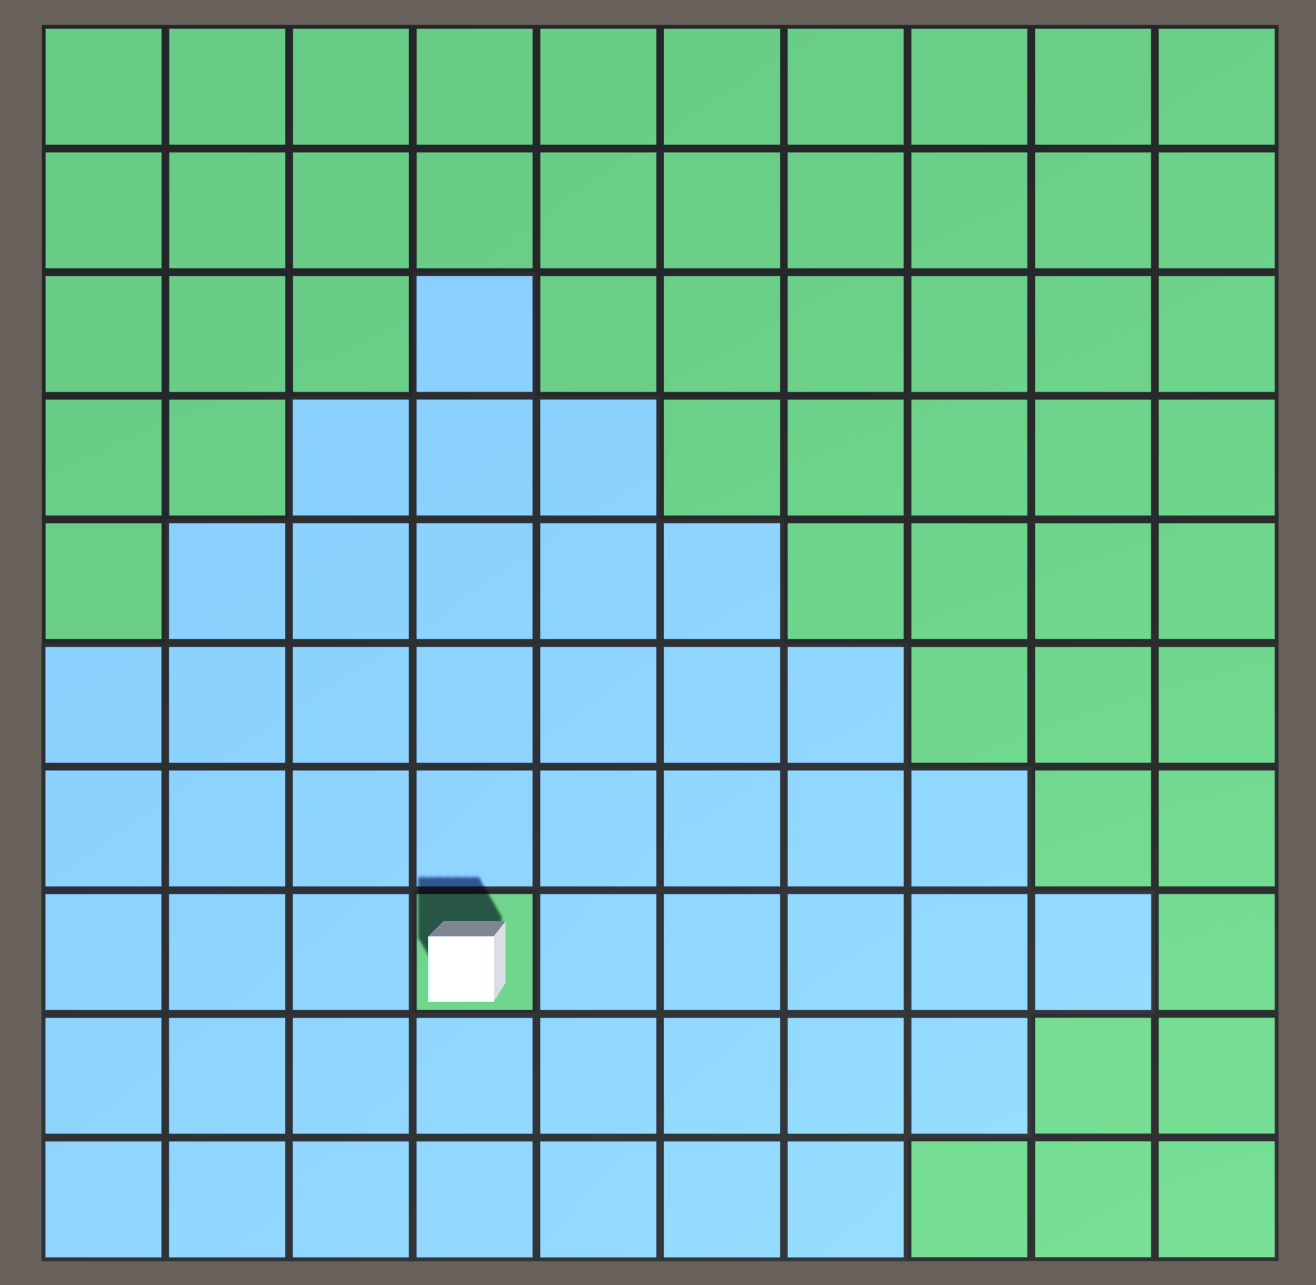
运动力为5时候的可移动范围

移动力为5时的移动范围(蓝色方块)

显示前进路线

在实现显示移动范围后,我还需要显示前进的路线,路线本身实际上就是已经实现的A*算法。但是如何可视化却花了我一个下午的时间。 20220614212403
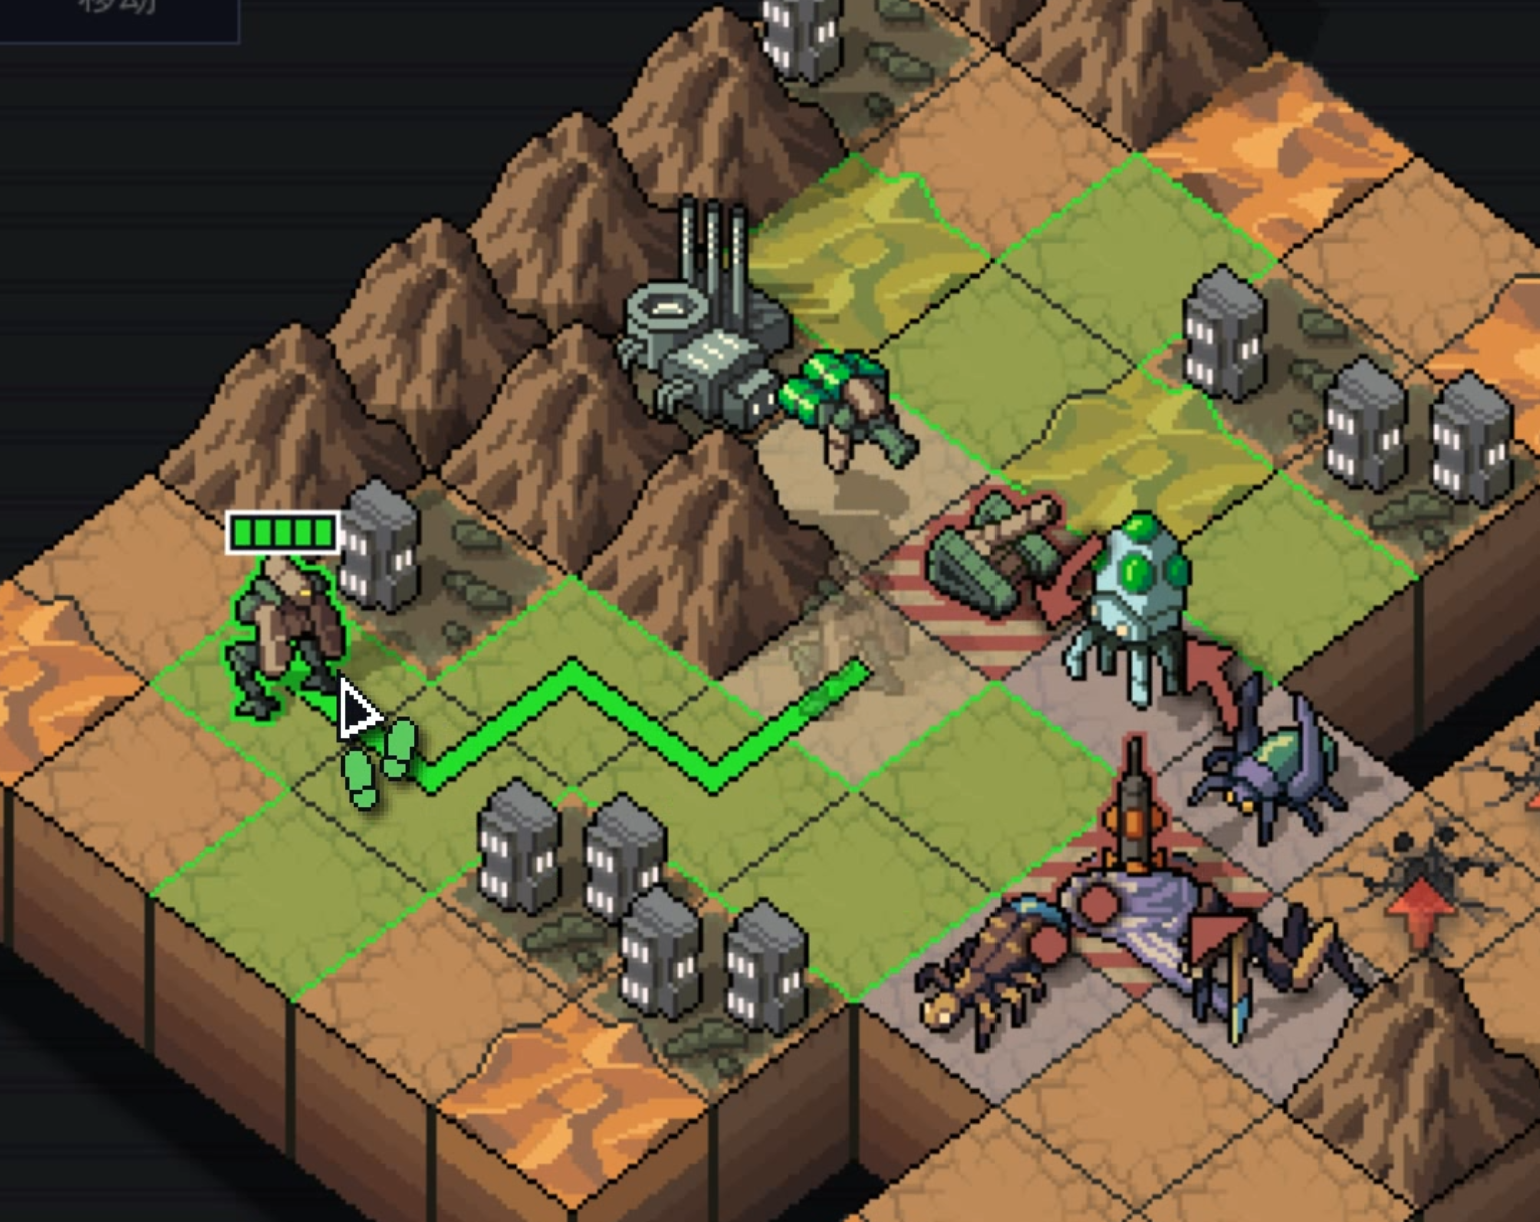
陷阵之志中的前进路线(绿线)

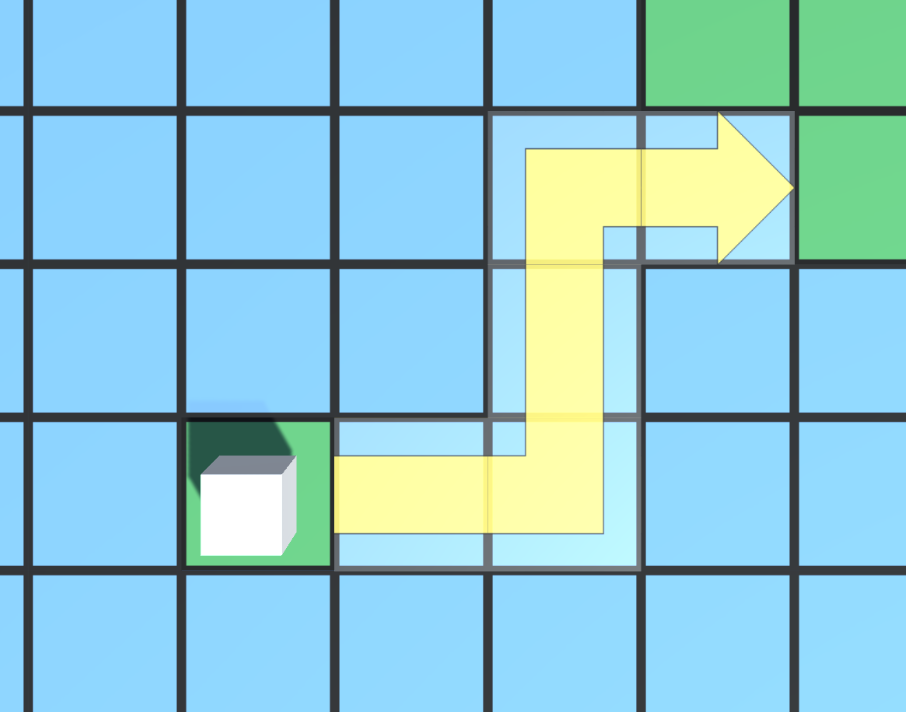
我一开始的想法是使用3D模型来显示箭头和线段。但是在花了近一个小时看blender的教程后,我连最简单的箭头模型都无法构建出来,最终我放弃了这种做法,改为手绘箭头和线段,并将其作为材质附加到Unity的Cube模型中.我其实对中间的过程完全不了解,在尝试之前我甚至不知道这是可行的。实际上,只需要将shader中的rendering mode设置为Transparent,在一些我并不了解的功能的作用下,模型会根据材质变得部分透明。 20220614212835
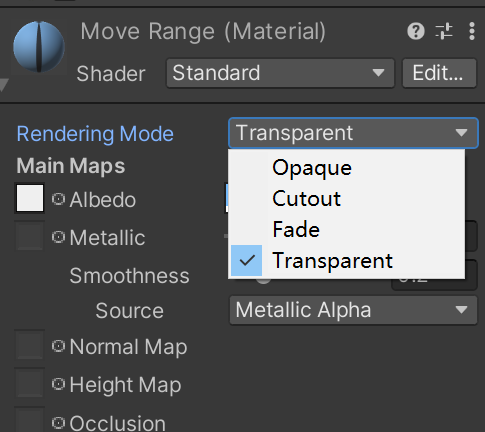
rendering mode的设置

我一共绘制了三类形状,分别是矩形、转角以及代表终点的箭头。我们可以通过旋转角度的方式来表示各个方向.这就是代码需要做到的事情了。
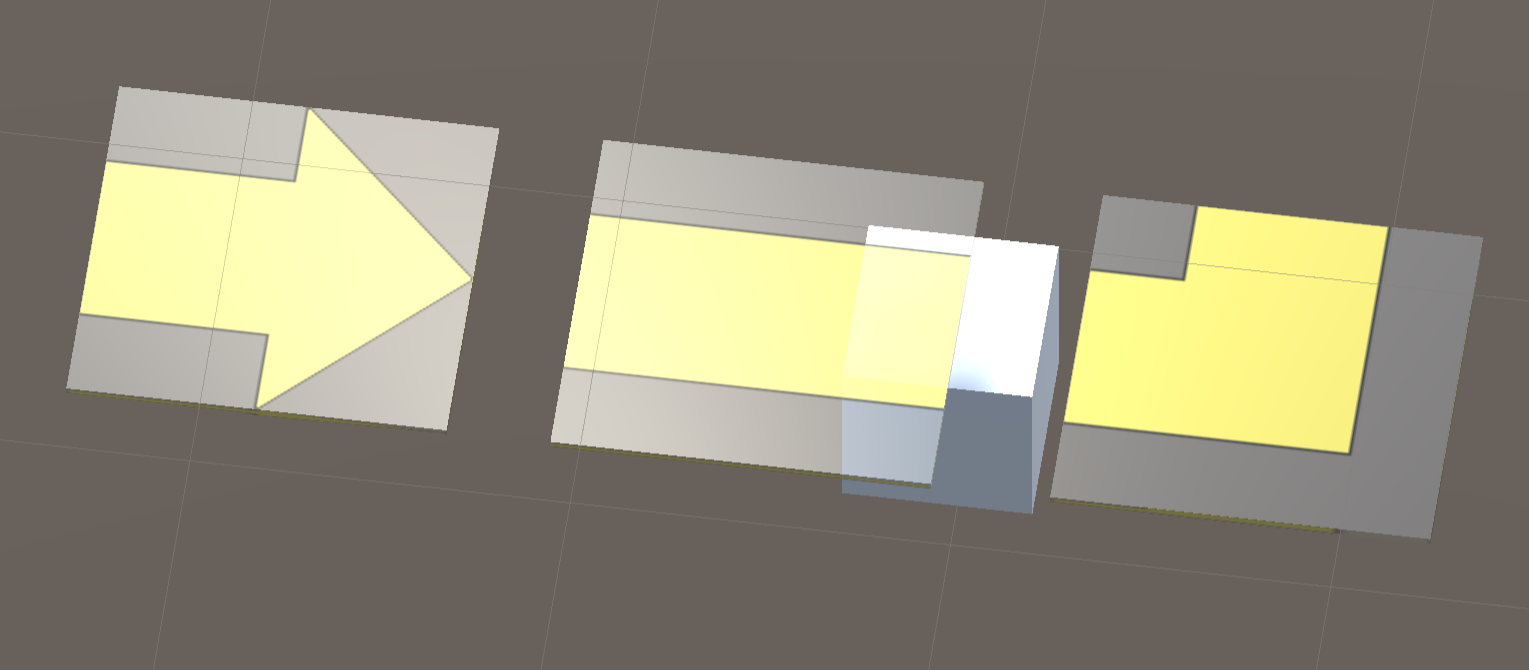
20220614213425

可见除了本体,其他部分是透明的

为了代码的复用性,我直接使用了此前的A*方法的输出作为新方法的输入。为了解耦,我将此前的UI的显示单独放在一个类中。该方法会在tile被点击的时候被调用。

1
2
3
4
5
6
7
8
9
10
11
12
13
14
public List<Node> generatePathWithSelectedUnit(int x, int y)
{
var path = generatePath((int)selectUnit.transform.position.x, (int)selectUnit.transform.position.z, x, y); // 此方法即为之前实现的方法
return path;
}
// 代码的调用 此处属于tile类中
void OnMouseEnter()
{
if (map.isInMovementRange(tileX, tileY) == true)
{
List<Node> path = map.generatePathWithSelectedUnit(tileX, tileY);
MapUI.instance.showPathUI(path);
}
}

在显示新的路线前,我们需要先移除此前生成的路线。随后,我们遍历路线。很容易想到,决定某个点是使用矩形、拐角和箭头图形的方向,只取决于该点、该点的上一点以及该点的下一点的相对位置关系。因此,我首先获得了last、cur以及next点.(在我的设计中,起始点不绘制在路线中,终点只可能出现箭头图案,因此单独考虑).为了表示点之间的位置关系,我将后点减去前点,并将结果normalized.通过这种方式得到的向量,我们只需要关注它在x还是y轴是否存在值,以及值的正负情况即可。这是需要一点时间总结的,我大部分的时间就在思考点与点的相互关系上了。按照关系画图应该有助于更快得出结果. 显然,在我的实现里,我先区别图形(即是矩形、拐角还是箭头),具体来说,当cur与last的方向与next与cur的方向一致的话,cur应该被画成矩形。当他们不一致的时候,则应该是拐角。路径的终点是箭头。对于方向来说,我们需要先确定模型在Unity中的初始方向,然后根据三个点的相对关系即可得到旋转的角度。最终,我们依次实例化这些预制件,即可得到效果.

1
2
3
4
5
6
7
8
9
10
11
12
13
14
15
16
17
18
19
20
21
22
23
24
25
26
27
28
29
30
31
32
33
34
35
36
37
38
39
40
41
42
43
44
45
46
47
48
49
50
51
52
53
54
55
56
57
58
59
60
61
62
63
64
65
66
67
68
69
70
71
72
73
74
75
76
77
78
79
80
81
82
83
84
85
86
87
88
89
90
91
92
93
94
95
96
97
98
99
100
public void showPathUI(List<Node> list)
{
clearPathUIs();
for (int i = 1; i < list.Count; i++)
{
if (i < list.Count - 1)
{
Node last = list[i - 1];
Node cur = list[i];
Node next = list[i + 1];
Vector2 last_cor = new Vector2(last.x, last.y);
Vector2 cur_cor = new Vector2(cur.x, cur.y);
Vector2 next_cor = new Vector2(next.x, next.y);
Vector2 orientation_last = (cur_cor - last_cor).normalized;
Vector2 orientation_next = (next_cor - cur_cor).normalized;
if (orientation_last.x == orientation_next.x && orientation_last.y == orientation_next.y)
{
if (orientation_last.x == 1 || orientation_last.x == -1)
{
GameObject go = Instantiate(UIPath, new Vector3(cur.x, path_pathArrowHeight, cur.y),
Quaternion.Euler(0,0,0));
pathUIs.Add(go);
}else if (orientation_last.y == 1 || orientation_last.y == -1)
{
GameObject go = Instantiate(UIPath, new Vector3(cur.x, path_pathArrowHeight, cur.y),
Quaternion.Euler(0,90,0));
pathUIs.Add(go);
}
}
else
{
// 0 left 1 right
int horizontalCode = 0;
// 0 top 1 bottom
int verticalCode = 0;
if (orientation_last.x == -1 || orientation_next.x == 1)
{
horizontalCode = 1;
}
if (orientation_last.y == 1 || orientation_next.y == -1)
{
verticalCode = 1;
}
if (horizontalCode == 0 && verticalCode == 0)
{
GameObject go = Instantiate(UIPathCor, new Vector3(cur.x, path_pathArrowHeight, cur.y),
Quaternion.Euler(0,180,0));
pathUIs.Add(go);
}else if (horizontalCode == 1 && verticalCode == 0)
{
GameObject go = Instantiate(UIPathCor, new Vector3(cur.x, path_pathArrowHeight, cur.y),
Quaternion.Euler(0,-90,0));
pathUIs.Add(go);
}else if (horizontalCode == 0 && verticalCode == 1)
{

GameObject go = Instantiate(UIPathCor, new Vector3(cur.x, path_pathArrowHeight, cur.y),
Quaternion.Euler(0,90,0));
pathUIs.Add(go);
}else if (horizontalCode == 1 && verticalCode == 1)
{
GameObject go = Instantiate(UIPathCor, new Vector3(cur.x, path_pathArrowHeight, cur.y),
Quaternion.Euler(0,0,0));
pathUIs.Add(go);
}
}

}
else
{
Node cur = list[i];
Node last = list[i - 1];
Vector2 cur_cor = new Vector2(cur.x, cur.y);
Vector2 last_cor = new Vector2(last.x, last.y);
Vector2 orientation = (cur_cor - last_cor).normalized;
if (orientation.x == 1)
{
GameObject go = Instantiate(UIPathArrow, new Vector3(cur.x, path_pathArrowHeight, cur.y),
Quaternion.Euler(0,180,0));
pathUIs.Add(go);
}else if (orientation.y == -1)
{
GameObject go = Instantiate(UIPathArrow, new Vector3(cur.x, path_pathArrowHeight, cur.y),
Quaternion.Euler(0,270,0));
pathUIs.Add(go);
}else if (orientation.x == -1)
{
GameObject go = Instantiate(UIPathArrow, new Vector3(cur.x, path_pathArrowHeight, cur.y),
Quaternion.Euler(0,0,0));
pathUIs.Add(go);
}else if (orientation.y == 1)
{
GameObject go = Instantiate(UIPathArrow, new Vector3(cur.x, path_pathArrowHeight, cur.y),
Quaternion.Euler(0,90,0));
pathUIs.Add(go);
}
}

}
}

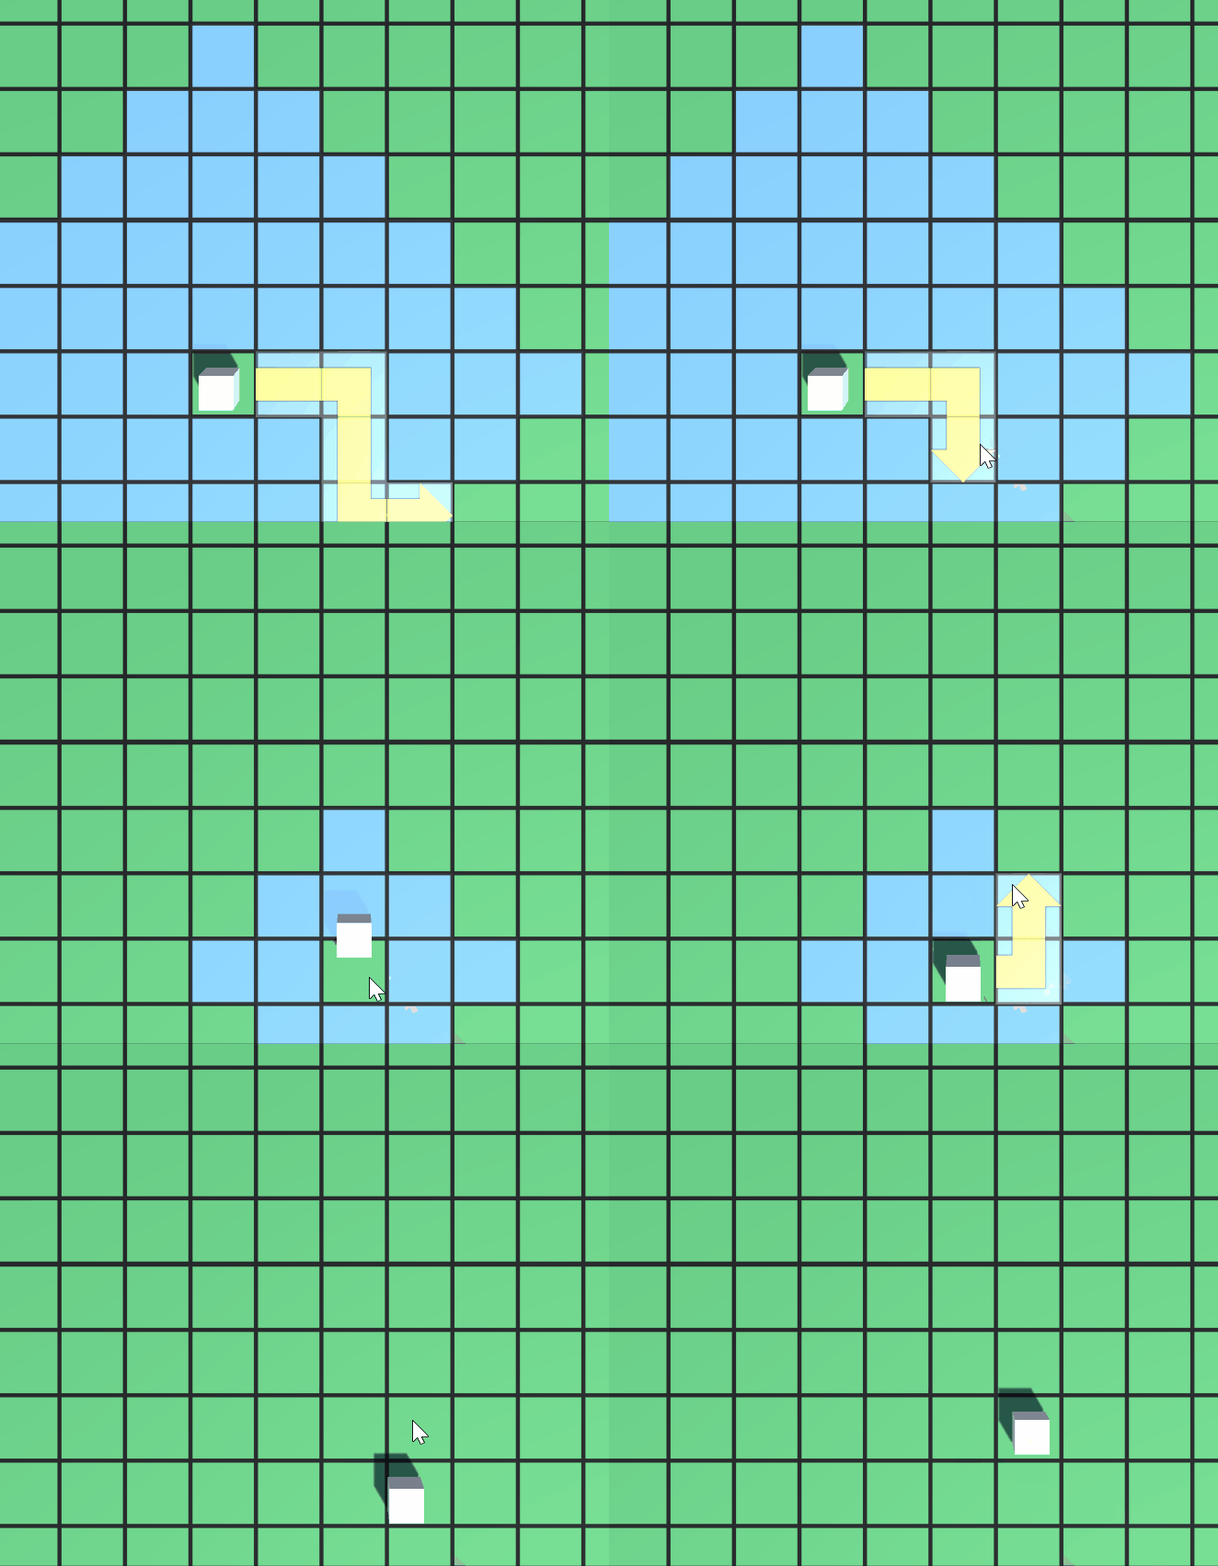
20220614215430

可见线路正确被正确处理了

角色按照前进的路线进行移动

在完成之前的所有步骤后,我们就可以实现角色的移动了。对于角色移动,我希望角色能够按照此前实现的前进路线移动,而非直接跳转。这就需要我们将路线传递给角色。同时,由于回合制的关系,我个人觉得如果update中使用类似于flag的形式决定角色的移动是浪费的,因为在某个确定的时间段,几乎只会有一个角色在进行移动。因此,我参考了塞巴的Unity入门教程中有关协程的部分,使用协程来对角色进行移动。值得注意的是我们需要使用两个协程方法来处理拥有多个点的路线的移动。即一个协程用来依次调用路线中的所有节点,另一个则单纯处理点到点之间的移动。我们还需要注意及时终止重复的协程,不然的话就会导致角色卡住或者乱动。以下代码写在Unit类中,该脚本负载在角色上。整个调用流程如下:我们点击一个tile,tile识别鼠标点击,并调用Map类中的移动方法。该移动方法由tile调用,因此知晓了其目的地,随后,该方法会根据绑定在Map类中的selectedUnit属性,即当前选中的角色,调用该角色中的Move方法如下所示。为了获取移动后的结果,我在这使用了Unity的Action方法。即EventSystem类中的EndMovement()方法,传递了终点信息。该方法会通知Map进行一系列必要的操作,包括移动后进行移动力结算,重新绘制移动范围等。

1
2
3
4
5
6
7
8
9
10
11
12
13
14
15
16
17
18
19
20
21
22
23
24
25
26
27
28
29
public void Move(List<Node> list)
{
pathWay = list;
StartCoroutine(MoveWithPathway());
this.movementAbility = (int) list[list.Count - 1].remainMovement;
EventSystem.instance.EndMovement(list[list.Count - 1]);
}
IEnumerator MoveWithPathway()
{
foreach (var target in pathWay)
{
if (moveCoroutine != null)
{
StopCoroutine(moveCoroutine);
}
moveCoroutine = MoveTo_Coroutine(target, 20f);
StartCoroutine(moveCoroutine);
yield return moveCoroutine;
}
}

IEnumerator MoveTo_Coroutine(Node target, float speed)
{
while (transform.position.x != target.x || transform.position.z != target.y)
{
this.transform.position = Vector3.MoveTowards(transform.position, new Vector3(target.x, transform.position.y, target.y), speed * Time.deltaTime);
yield return null;
}
}

移动的展示以及图片

为了表现移动过程,我减慢了角色的移动速度

Unit命令的回退以及命令模式

在我们实现了角色的移动后,我们还需要实现角色动作的回退。显然,对某时的后悔之心会出现在任何事情上,自然也包括游戏。因此,为了方便的实现对于操作的回退,我们这里需要使用命令模式.《游戏编程模式》这本书里介绍了一些常见设计模式在游戏开发中的用法,对我来说非常实用。因为写出一个勉强能跑的程序是毫无成就感的事情,而高贵而繁复的设计模式能够让我有种我也是资深程序员的错觉。总之,让我们开始吧。

为了实现命令模式,我们需要先定义一个command接口。该接口规定了两个方法,分别是execute()以及undo()。不言自明的,前者用于执行,后者用于回退。

1
2
3
4
5
public interface Command
{
public void execute();
public void undo();
}

接下去,让我们为目前唯一可行的操作——移动创建一个移动命令。目前来看,一个移动命令需要三个参数。分别是需要移动的_unit、移动的_route以及本次移动的花费mobilityCost.因此,我们需要在构造函数中加入这三个参数。然后我们需要实例化实现接口定义的execute()undo().逻辑很简单,先让_unit按照_route进行移动操作,然后根据花费更新_unit的行动力movementAbility即可。回退操作即使反过来,先将_route反转,再进行移动以及行动力的更新操作。

1
2
3
4
5
6
7
8
9
10
11
12
13
14
15
16
17
18
19
20
21
22
23
24
public class MoveToTileCommand : Command
{
private Unit _unit;
private List<Node> _route;
private float mobilityCost;
public MoveToTileCommand(Unit moveUnit, List<Node> route, float mobilityCost)
{
_unit = moveUnit;
_route = route;
this.mobilityCost = mobilityCost;
}
public void execute()
{
_unit.Move(_route);
_unit.minusMovementAbility(mobilityCost);
}

public void undo()
{
_route.Reverse();
_unit.Move(_route);
_unit.plusMovementAbility(mobilityCost);
}
}

在定义完我们所需要的命令后,我们还需要创建一个用于管理命令的类UnitCommands.这个类的主体就是一个栈,用于保存和回溯命令。在入栈的同时执行命令的execute(),在出栈时执行undo().

1
2
3
4
5
6
7
8
9
10
11
12
13
14
15
16
17
18
19
20
21
22
23
24
25
26
27
28
public class UnitsMovements
{
private Stack<Command> _commands;

public UnitsMovements()
{
_commands = new Stack<Command>();
}

public void addCommand(Command newCommand)
{
newCommand.execute();
_commands.Push(newCommand);
}

public void undoCommand()
{
if (_commands.Count > 0)
{
var lastCommand = _commands.Pop();
lastCommand.undo();
}
}

public int getCommandsCount()
{
return _commands.Count;
}

在做完以上所有的前置工作后,我们终于能够使用命令模式让角色进行移动了。我们先清空所有的UI,再实例化我们的MoveToTileCommand类,并将该对象加入_unitCommands中。

1
2
3
4
5
6
7
public void selectUnitMove(List<Node> route, float mobility)
{
MapUI.instance.clearMovementUIs();
MapUI.instance.clearPathUIs();
Command unitMoveTo = new MoveToTileCommand(selectedUnit, route, mobility);
_unitCommands.addCommand(unitMoveTo);
}

由于我们还没有完成我们的游戏UI,因此在这里我简单地用一个按钮进行回退命令的执行,来看看效果.如果说命令模式有什么缺陷的话,那就是它往往需要定义许多的类来满足各类操作的需求,这往往会造成冗余。至于解决方法,以我的水平来说难以想到,实际上,我还没有因为类的冗余而困惑过。
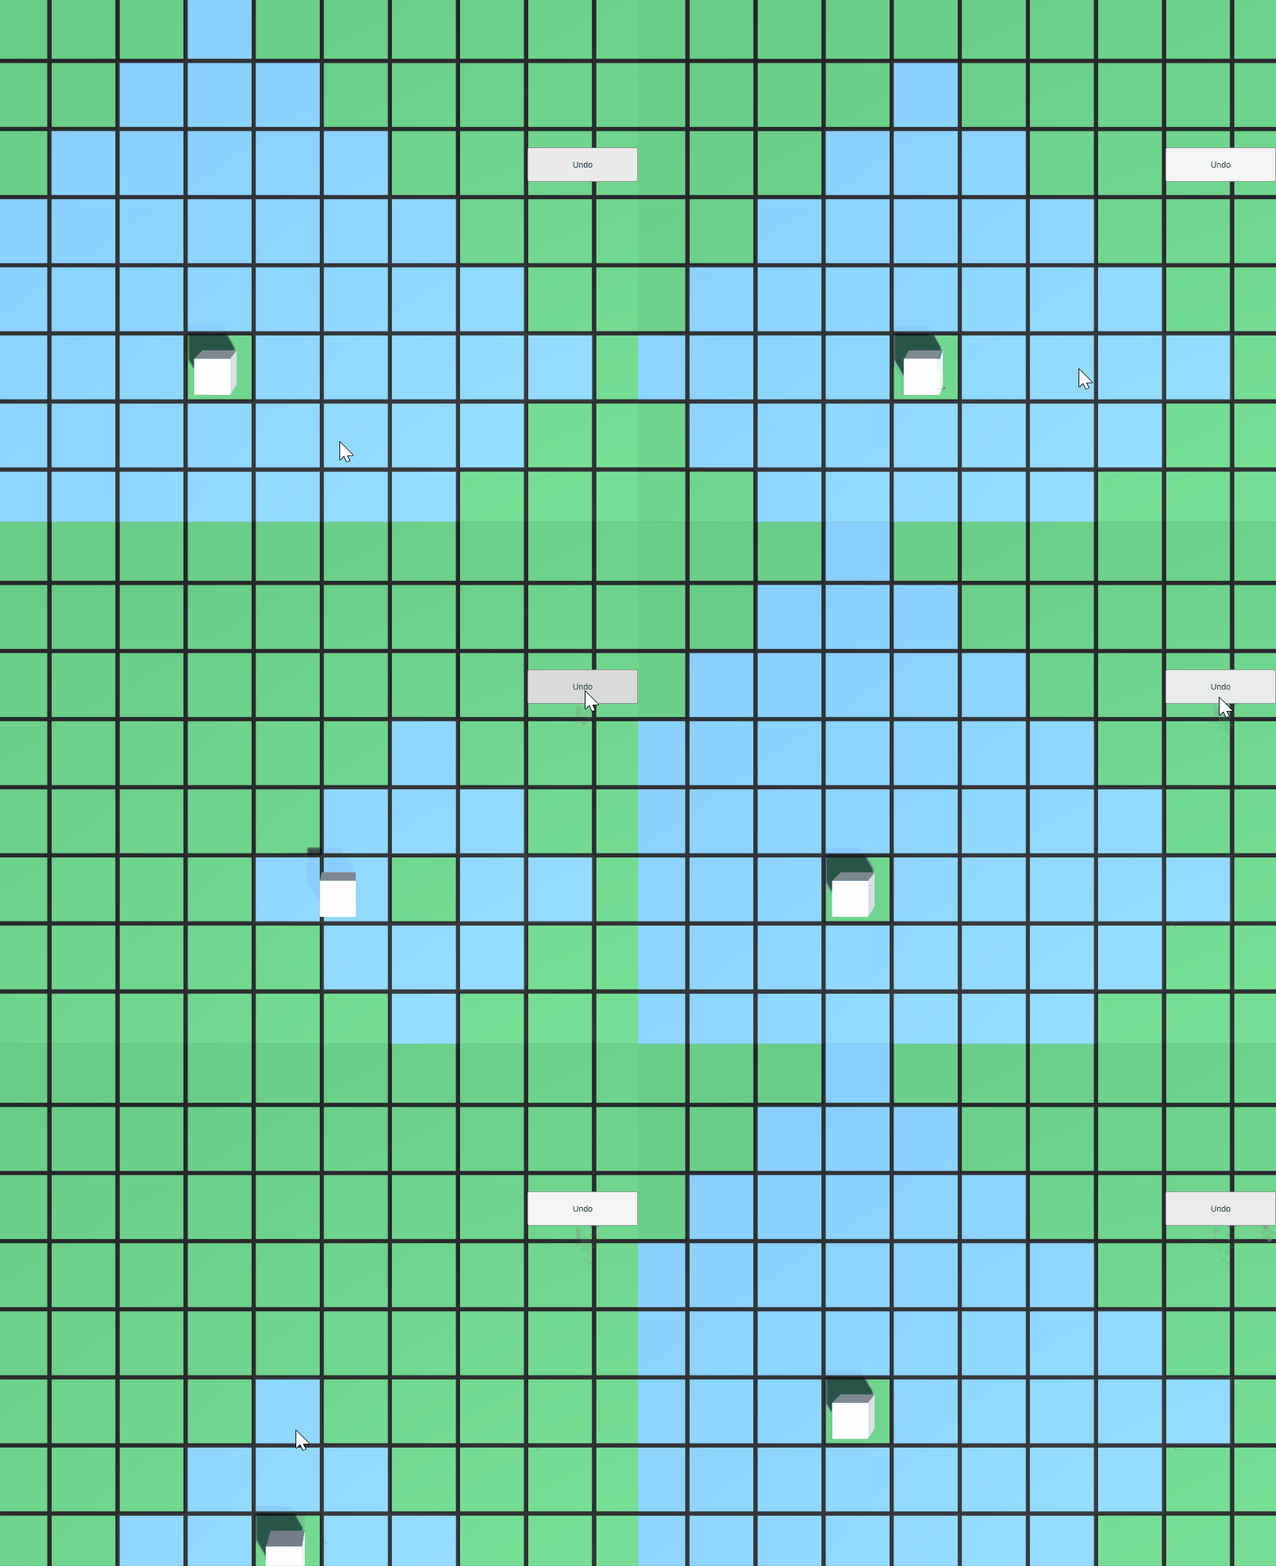
移动1

undo演示